Saturday, October 12, 2013

German Style Potato and Sausage Stew

It is fall! Time to start eating soup 24/7 and staying in warm clothes and boots for the next 6 months, haha! I whipped this one up last week and could stand to make it again this week. While it isn't the most gorgeous soup ever, it is delightful. Enjoy!

German Style Potato and Sausage Stew

German Style Potato and Sausage Stew
2 tablespoons olive oil
1 package chicken sausage
1 teaspoon cracked black pepper
1 teaspoon caraway seeds
3 cloves garlic
1 bottle lager beer
3 medium carrots, sliced
3 stalks celery, diced
5 medium russet potatoes, cubed
3 cups chicken stock, hot
2 tablespoons apple cider vinegar
2-3 teaspoons parsley

1. Heat up a medium-sized dutch oven or pot with olive oil over medium heat. When hot, placed sliced chicken sausage into oil. Allow to brown well, the crunchy bits are delicious. Grind the caraway seeds to a fine powder separately.
2. When sausage is done, add garlic, caraway powder, black pepper. When this starts to smell amazing, add the lager slowly. Make sure you scrape the bottom of the pot to get any of the "burned" parts up, should turn your broth very dark.
3. Add the carrots, celery, and potatoes. I chose not to peel my potatoes, but if you want, go for it.  Carefully add the hot chicken stock to the pot. Stir carefully to incorporate everything together.
4. Allow this to cook on medium-medium low until the potatoes are tender, 40-45 minutes.
5. Mash a few of the potatoes to bring the consistency up to your desired thickness.
6. Just before serving, add the ACV and stir well. Top with parsley. I served mine with fresh French bread that I added a few teaspoons of olive oil, sea salt, chile powder, and garlic powder. Then I toasted the sliced bread up for a few minutes in the oven and it was the perfect accompaniment to this rich soup.

See Ya Later Nasty Backyard!

We bought a foreclosure, a foreclosure in pretty bad shape none the less. In August, we will have been here for 2 years. The first year, we spent all our time and energy getting the inside how we wanted it. This spring, we started with the outside. We hired a painting company to revamp the outside and it made quite the impact. Neither of us really know how to deal with high desert climate and how to start landscaping in that climate. So, instead of landscaping a ton, we have decided to do a paver patio with some major flower beds to increase our privacy from the golf course and make it known that people actually live here now! This backyard project was quite a bit of work and there were many times we just wanted to quit. Now that it is done, it was so worth it!

First, we decided on our space taking into account that we wanted the flower beds to flow seamlessly from the patio. We dug down our area between 6-8 inches depending on how far it needed to be to be level... sort of!

When we finished digging down, we filled the hole back up with 3 inches of sand in order to make a solid base for the pavers.

Then we started laying the pavers. I started at the high side of the space and leveled each paver according to the previous one. I worked out in angles to keep it as level as possible. This was the most time consuming part. Only one person could really work on it at a time to preserve the level-ness.

Once the outside edges were done, we could start with the flower beds. I wanted it to be smooth on top and graduated on the bottom, this way it seems more solid to me. That also meant we needed to dig out a pathway for the bottom row to stay level. We did this same process on the flower bed that the previous owner had done, but they had used large boulders as the retaining wall. We also added in a small veggie garden to grow some tomatoes and jalapeno peppers - guacamole anyone?!
Once the patio was finished, we added 100 lbs of playground sand on top and brushed it in each seam to help with the solidity of the patio. We did this over a few days - brushed it around, sprayed it with the hose, let dry. Repeat. When this was all done, we added a small fire pit to the center, some great Target furnishings with Home Depot cushions and voila! Looks much, MUCH better! Now to let some plants grow, grab some more landscaping base rocks to fill in where we had to dig up and our back yard fits in with the much more prestigious homes in the neighborhood!


Wednesday, July 3, 2013

Fourth of July Cakeballs

Happy 4th of July!! These cakeballs are super festive and easy to share with a large crowd.  We served these at our picnic and they went over so well - especially with the "fireworks" inside!

Fourth of July Cakeballs
Festive Fourth Fireworks Cakeballs
1 box of confetti cake, prepared as directed on box in 13x9 pan
1 container confetti frosting (or cream cheese frosting)
2 containers of dipping white chocolate
Red and blue food coloring

1. Take cooled confetti cake and crumble in large bowl.
2. Warm frosting in microwave for about 20 seconds, just to soften it up.
3. Combine crumbled cake and container of frosting until it is fully mixed. It will be pretty mushy and a little wet, that is ok!
4. Form 1-inch balls of cake/frosting; place on waxed paper on a baking sheet. When all cake is formed into balls, place baking sheets in freezer for about 2 hours to firm.
5. Melt white chocolate. Divide into 3 bowls. Will need smallest amount of red, medium amount of blue, largest amount of white. Add several drops of food coloring to the chocolate until you get the color you desire.
6. Arrange the balls into a rectangle on a sheet pan and decide how you'd like your flag to look. Dip into white and blue colored chocolate. Allow these to harden slightly. Drizzle red chocolate over white cakeballs to simulate the red and white stripes of the flag.
7. Pop the sheet pan back in the freezer to allow the chocolate to set up quickly and continue to harden the cake inside. This helps to prevent everything from getting melty in the hot July weather.

Tuesday, June 4, 2013

Easy Peasy Steak Marinade

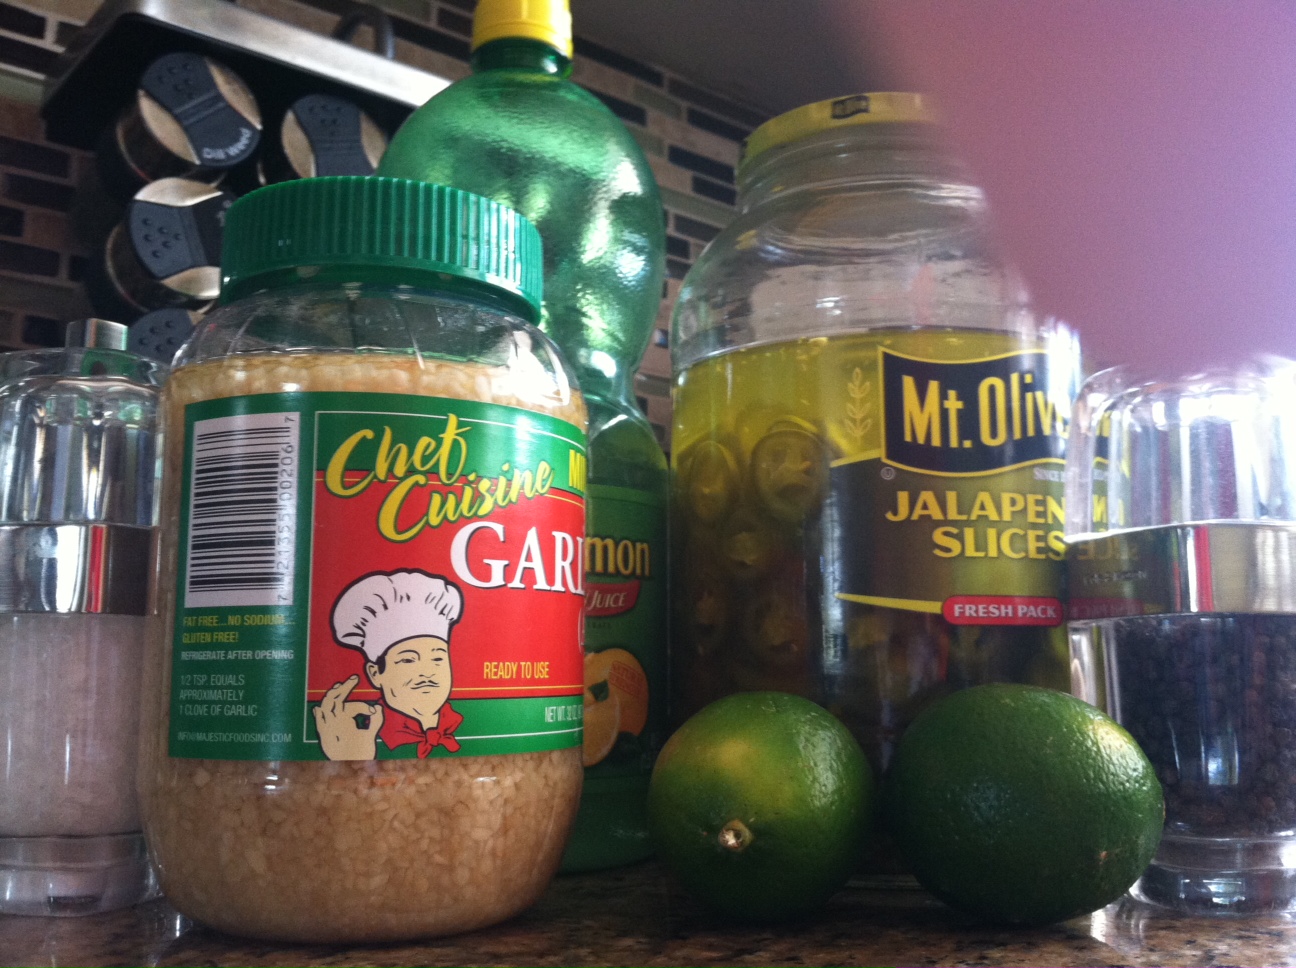
Despite its obnoxious color, Rick Bayless is onto something with this marinade. I have a slight obsession with Chef Bayless and he has never failed me! This green yumminess takes seconds to whip up and flavors the steak (or any other meat!) quickly. I left it on our steaks for about an hour and it was delectable!

Easy Steak Marinade (modified from the great Rick Bayless)
1/2 cup sliced, pickled jalapeƱos
2 tablespoons garlic
1/4 cup lime juice
1/4 cup lemon juice
Salt and pepper

1. Char the garlic and jalapenos over medium heat for 10 minutes.


2. In a food processor (or in our case, the Magic Bullet (R)), combine the juices, peppers, and garlic. Mix until smooth.

 
3. Prepare the steaks with salt and pepper. What I have been told is to overdo it with the salt to impart more flavor. I tend to overdo it with the pepper as well :)

 
4. Add the marinade to a Ziploc bag, then cover the steaks with the marinade. I kept our steak/marinade bag in the refrigerator for about an hour. I then let the combo come to a warmer temperature for about a half hour before grilling by leaving it out on the counter. Make sure your grill is nice and hot before you place your steaks on it to get those gorgeous grill marks! I was too hungry to take a picture of the finished product, but trust me - delish!


Sunday, June 2, 2013

Ta-Da!! New Kitchen!!

Backsplash 101

We are trying to slowly upgrade our home on a budget. We started in the kitchen with a backsplash. When we bought the house, the kitchen was fine, but compared to the beautiful and open spaces in the rest of the house, it just seem OK. Wow, what a difference the backsplash has made. It has taken this barebones kitchen to fantastic. Check it out!


We started the transformation by clearing off all the countertops and scrubbing down the wall where we would be tiling.

 Then we added SimpleMat tile adhesive. This saved us quite a bit of money and time. We were able to do the mat over 2 days and not need to worry about it drying out overnight. Since we had a party to go to Saturday afternoon, we started in the morning and got about halfway through the mats before heading out. When we started the next morning, we were able to keep going with the mat and start the tiles.


According to the packaging, we could grout immediately. So, we grouted and let it sit for a few hours before cleaning off. We love the results! Not bad for our first major DIY project!  


Tuesday, April 9, 2013

Eggless Chocolate Cake

I am obsessed with sweets and desserts... I could have them all day, every day. It hit me hard yesterday. I found some chocolate cake mix, opened the fridge and low and behold, no eggs. After a quick search through a book I have with cooking substitutions, I found a flax-egg substitute. I'll be honest, I was very skeptical at how it would turn out - it didn't get as airy as normal, but we are also at 7000 feet elevation, so it could be that. I also didn't have chocolate frosting, only cream cheese flavored so I had to improvise on that as well.

Eggless Chocolate Cake
1 box of cake mix - I used devil's food. I think this would work fine with anything with some color to it.
3 tablespoons flax meal
9 tablespoons water
1 and 1/2 cup water (per package)
1/2 cup vegetable oil (per package)

Chocolate Frosting
1 container cream cheese frosting
1 package chocolate pudding
1/2 cup soy milk

I love that we can get Kroger brand out here in AZ!
For the cake:
1. In a separate bowl, combine flax meal and 9 tablespoons of water to substitute for 3 eggs. (1 egg = 1 tablespoon flax to 3 tablespoons water). Stir to combine and pop in the fridge for 5-10 minutes.
2. Prepare cake according to package, substituting flax for egg after it has chilled and thickened. Bake as directed.
3. Frost when cooled.

For the frosting:
1. Mix soy milk and package of pudding.
2. Warm the frosting for 20 seconds in the microwave to soften and make it easier to mix.
3. Combine frosting with pudding mixture. Stir for several minutes then let it sit for a few minutes to thicken.
4. Frost cake, add chocolate chips to top if desired.
Eggless Chocolate Cake

Saturday, April 6, 2013

Homemade Spiced Garlic Bread

My inspiration for starting up this "blog"... aka recipe book... was Joy the Baker and she's also the source of this recipe. I made this a few months ago and we both loved it. I ended up giving half of it to our friends who had recently had a baby. It is a very dense bread that does so great with a soup, chili, or pasta. We had it with homemade potato and cheese pierogi.

Amazing Dinner!


Spicy Garlic Bread (from Joy the Baker)
1 cup water
2 and 1/4 teaspoon active dry yeast
Pinch of sugar
4 ounces butter, melted
1 tablespoon thyme (I used dried)
1 tablespoon chives, chopped (I used fresh)
1 teaspoon chili flakes
3 cloves of garlic, chopped
~4 cups flour
Black pepper
Sea salt

1. Sprinkle yeast over warm water and add sugar, stir.
2. Melt butter, add herbs, chili, and garlic. Stir.
3. Using bread hook, mix flour, salt, and pepper. Add yeast mixture, stir on low until ball forms.
4. Place in greased bowl and allow to rise for 1 hour until doubled in size.
5. Heat oven to 450.
6. Knead dough on slightly floured surface for about 2 minutes.
7. Coat a dutch oven with olive oil and place dough in the pot. You want to use a pot that is large enough for the cover to be placed over the dough. Slice an X in the top of the dough and coat with about 3 tablespoons of olive oil, fresh cracked pepper, and salt.
8. Bake covered for 30 minutes. Reduce heat to 400 and bake for another 15-20 minutes uncovered.